Here is the final outcome of Cassie and I’s disciplinary choice! We are both actually pretty happy with this as we feel that a lot of work was done within quite a short space amount of time. Obviously there are shots and bits that we would change looking back, but this was always an ambitious project which we feel that there are plenty of successes in too having learnt a lot. I have to shout out to Cassie for being a solid team mate and generally good mate who made this the least stressful project I have done, by making everything look pretty and fit within the scene in compositing and editing, as well as taking on shots such as the car driving, wheel spin, the skull, the campfire as well as modeling Megans mark. Really Cassie did the majority of the editing, all I really did on the assembly front was feedback as well as helping with some of the glitches in the flash back such as the bloody rabbit scene and the flashing help graffiti in the cloud one. So Cassie, I cannot thank you enjoy for asking for us to team up and making this a cohesive piece, it really was a pleasure.
And here is our piece ‘Desolate’ to the music of ‘Mirrorplay’ by Cubicolor, looking at the contrast between beauty and decay.
The end is here! This is our (near) Final Easter Ident. I say near because even though we had rendered out everything, when we went to collect them frames and segments of shots where missing. I believe it was because we where so wild spread across a number of computers that we lost track where we where rendering what. Although this does not effect the story line or our piece that much as what we are missing is not even a second or two, it does mean nice parts of animation with the monster have went missing. However these segments will be re rendered and in a later edit of this post I will share the actual Final Ident. But for now, enjoy!
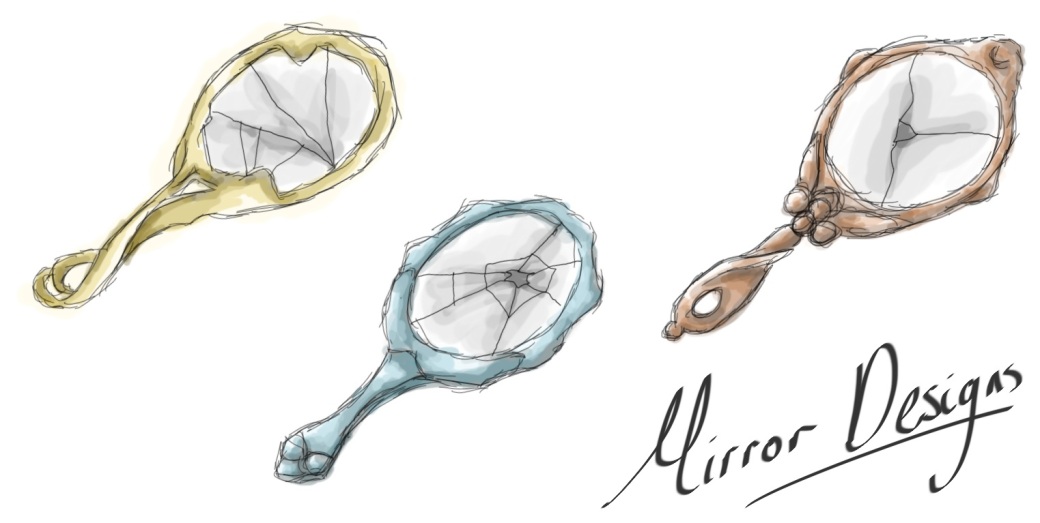
Before even beginning to assemble this scene, Cassie and I had agreed that a broken mirror might be a nice prop to reflect how the girls face is broken as well. Nobody had any models that would be suitable for this, so I said I would happily model this for the scene. I look at a range of vintage and Victorian hand held mirror and did a few based off these. From these concepts Cassie liked the middle one best, so I went ahead and models a simple mirror based off this, adding some reflective arnold shaders as well to make it more shiny and appealing like treasure, though this will be altered more once in the final scene.
When looking about for possible ways of creating the underwater look, I considered two way:
Use the preset within maya itself with does this, however the problem being it could not be rendered in arnold.
Create a scene myself using the likes of the ai fog and through lights projecting images.
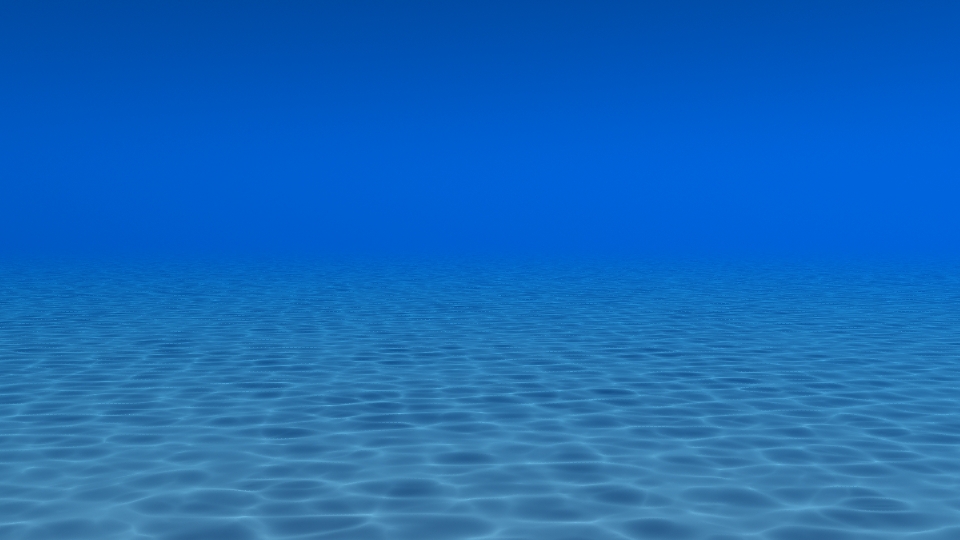
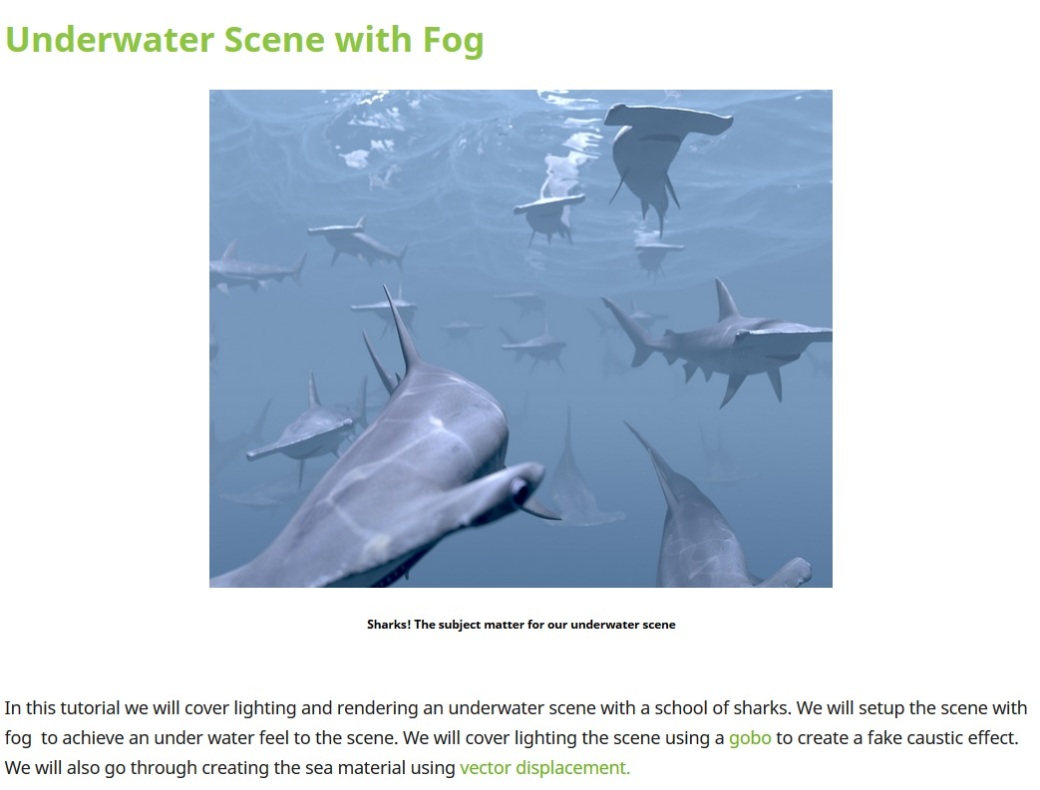
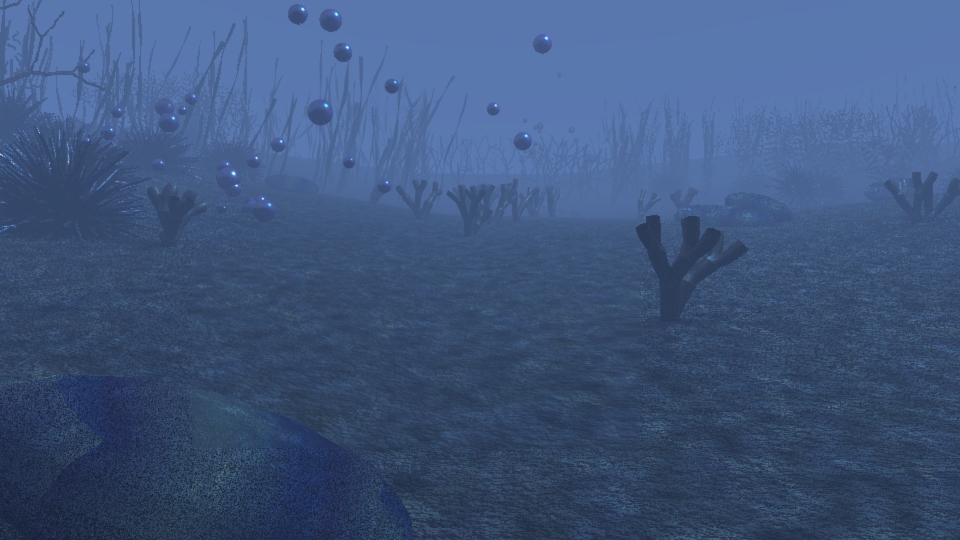
After consulting Cassie, we opted for the second option as we wanted to render it in arnold plus we felt we would have more control over the options. To help I found on Solid angle this clear Underwater Scene with Fog tutorial which was exactly what I was looking for. I decided to test this out though before hand on a basic scene to see the effect it would have on an underwater bed, whether I would still achieve the desired look. Bar altering the aiFog a lot to get it working with the scene rather than blanking out the render view, I could something that could work for our piece. I then called Cassie over to get her thoughts, and after a few more alteration in the sense of lighting brightening, as well as adding a bump map to the sand to make it seem more real, she was happy for me to go ahead, assemble the main scene and set up a similar light set up.
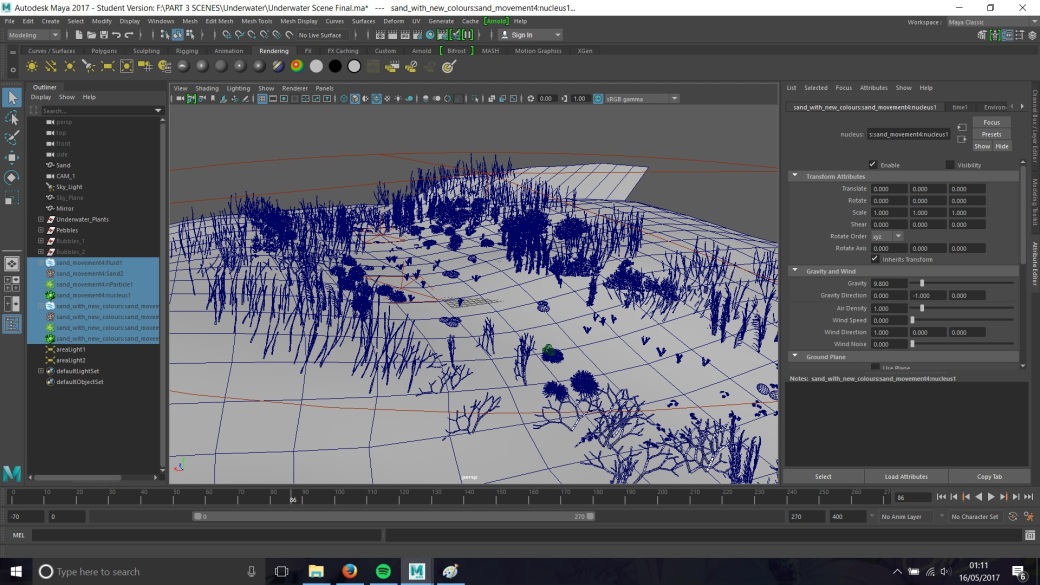
To set up the main scene, I first create a rough path in with the camera would follow and to place the underwater plants around. To create these plants I decided to use paint effects and turn them into geo. That geos mesh was then cleanup and reduced so the scene would run a little smoother. I just created a number of these and played about with where to place them, seeing what plants would look best where such as the smaller near the front, tall seaweed near the back. I kept the original textures that came with the presets as they worked fine for the scene. The only other this that I created was pebbles as Cassie felt like it was missing some rocks. So I basically smoothed out a cube and flattened a little and added an arnold ramp shader to this. Really there was not strange or magically about setting up the underwater environment and more a case of trial and error. I also put in the mirror and a similar lighting/ fog set up as before. The scene was nearly ready to go but it needed some movement and life going on in it.
I created two different simulations:
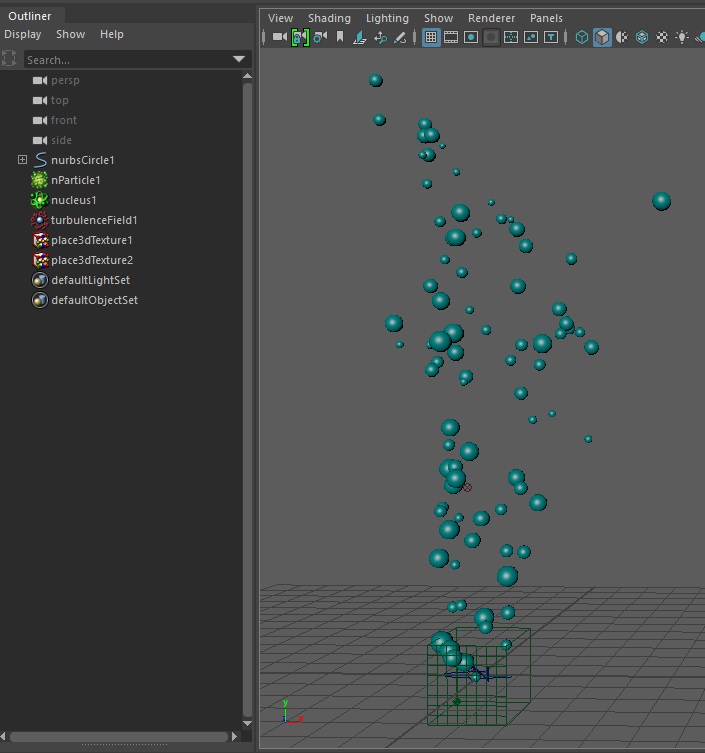
Underwater bubbles – I followed this tutorial, which generally was easy bar the only thing I learn was adding an expression to the raduis to have a variety of sizes.
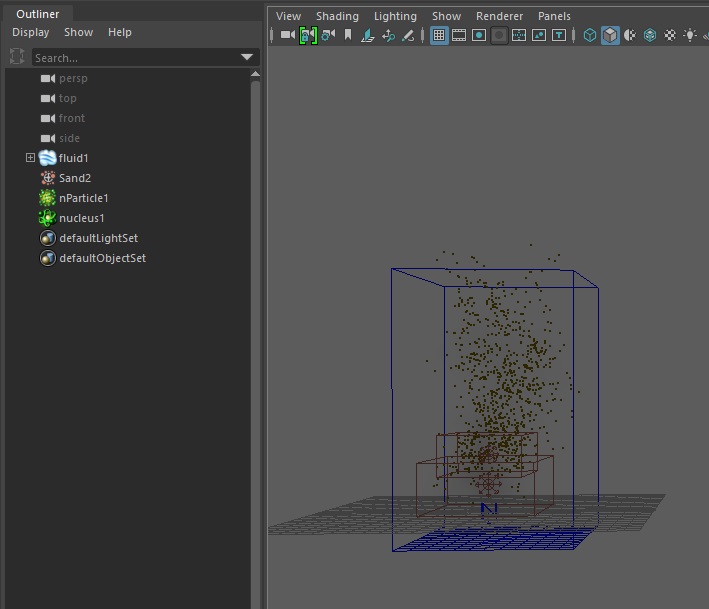
Underwater Sand – Again I followed a tutorial which show you how to propel and move particles through a fluid simulation. This I had to play about with more as if showed you the options and menu on what you needed to alter to get difference desired outcomes.
After doing this I then brought these into the scene, positioning two of each and recolouring both. The main problem I had though was with getting the bubbles to look more see through, as for some weird reason arnold standard shader does not allow this. To this fix, Cassie suggested putting the bubbles on a separate layer and then rendering these out separately so then the opacity could be changed in after effects. This I did and although it took a few times to render (missing frames, computers freezing mid render, forgetting to replug the texture files in, etc) we finally got there and where able to implement this scene set up into the final piece.
On to the leaf! Originally Cassie was working on this, however blend shapes was being awkward with her for reasons still unknown, plus her focus was on compositing and editing so the task was passed on to me which was no bother. The model we used was Caitlín/ Jonny leaf model from the church scene which was oked to use. To help me I looked at the likes of this simple generic art images of leaves falling as well as slow motion videos to see how they moved.
Fresh green leaves falling and spinning on white background
Based of this I create a variety of blend shapes for the leaf for it moving up and down.
I then used these to animate the leaf falling, again based off the previous videos. When I got Cassies feedback she said I needed more movement of the leaf shape itself, so I increased how much it flowed about. To set up the two scenes I used two area lights, one strong one to get a night line around the leaf edge, and a lighter one to make it seem more natural day. For texturing I just used a ramp and colour droped from the footage it would be apart of, then added a bump map to add a more left like feel to it rather than being a flat surface. (I upped the intensity of the rendered sill on the left just so them you could see better where the light was hitting it as against the black background is a tad hard to see)
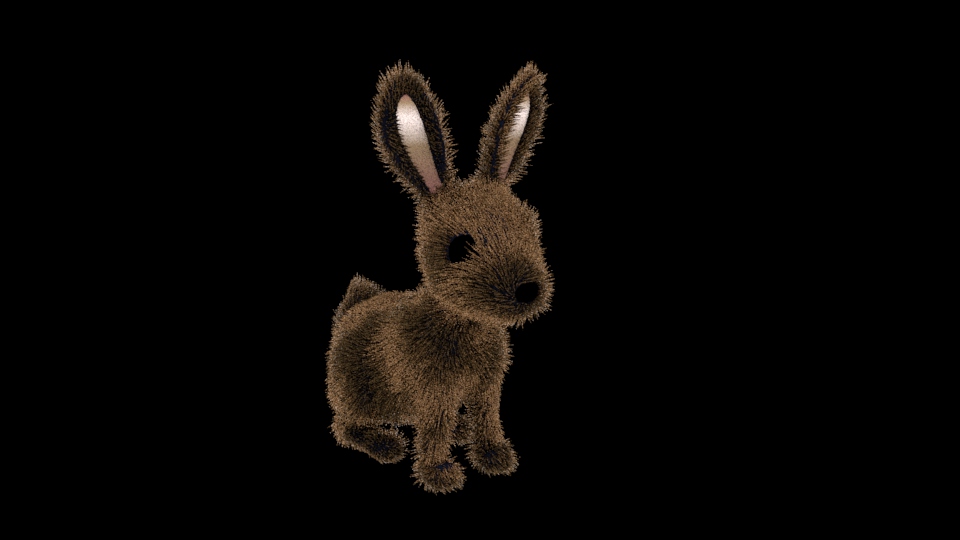
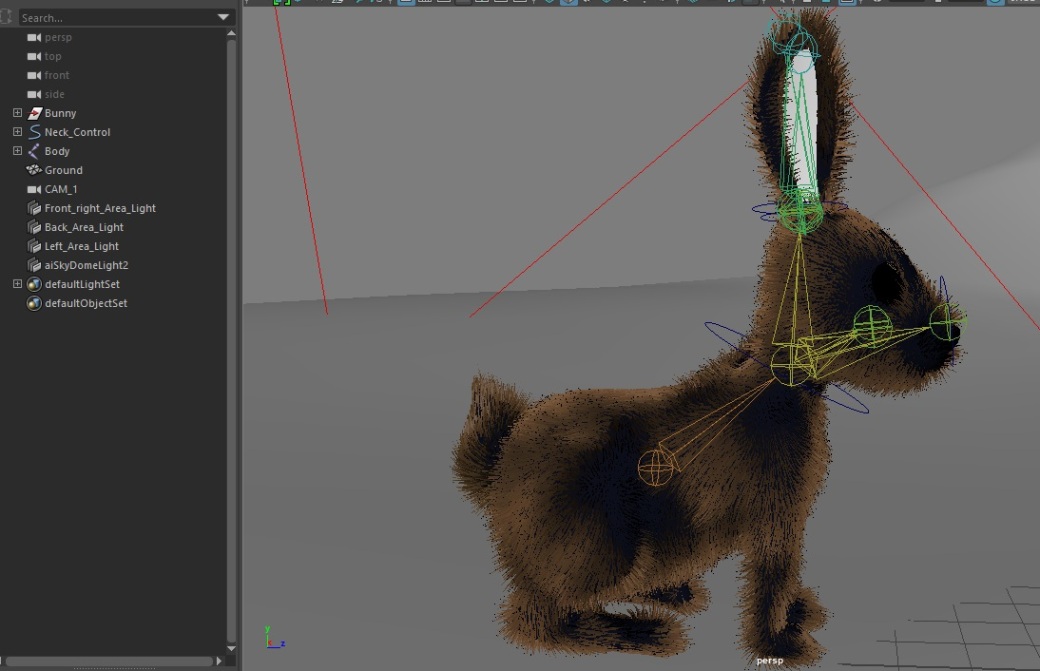
This one I am actually most proud of out of all the bits and bobs I have done for this project because I felt that I did not only the most amount of work for this scene, but a lot implemented a few things within it. To start off I asked Rebecca if I could use her rabbit model from her current client project which she was happy for me to do. On this I wanted to apply actual fur. I at first tried nHair, but I could not get the groomed effect that I wanted. I then went on to XGen which we had had a lecture on not too long before, plus this series of note that I had made actually sense and so helped a lot in how to create the description. All was going well with it, however I messed up and needed to restart because of two reasons:
I forgot to add fur to the tail and I wanted it to the be the same across the board, I was unsure how to add the same hair description to the tail.
I had accidentally applied to to the inside of the eye ball socket, forgetting to remove those faces in my duplicated mode, so I had hair coming through the eye geo. So I just thought it best to rest start.
I really like the grooming tools in XGen though, they are nice for getting the hair flow right, or getting more hair on certain areas (in my case being the chest, back and legs), as well as adding noise nodes so then some mores are more noisey than others and so on. I tried to get a balance between it looking like a groomed bunny and it looking like a wild hare. Either way I had fun while doing it and it doesn’t look too bad considering this is my first proper try at this program. I still needed to alter the colours of the bunny to match the scene more, but overall not a bad start to get this guy in the scene. But the fur shape I was happy enough with so I convert this in a geo to make working with it in the next stages a bit easier.
Something I really wanted to show was the bunny moving it’s head. However this involves rigging. But I was happy to do it as it was only from the neck up. I added joints at his back as a main one, his neck, check (incase I wanted to have they move more), nose (again in case I wanted to move this), top of the head, bottom of the ears as well as top. I then added controls for the neck, nose, bottom and top of the ears. Then I painted the weights, however a problem I noticed was that the fur, although I had combined that too the rig too as intended, I had only painted the weights on the base geo and not the fur. But luckily copying and pasting the skin weights on to it worked like a charm. After doing some regrouping to make sure the eyes, nose and inside of the ears followed, the rig was working and the bunny was ready to be animated.
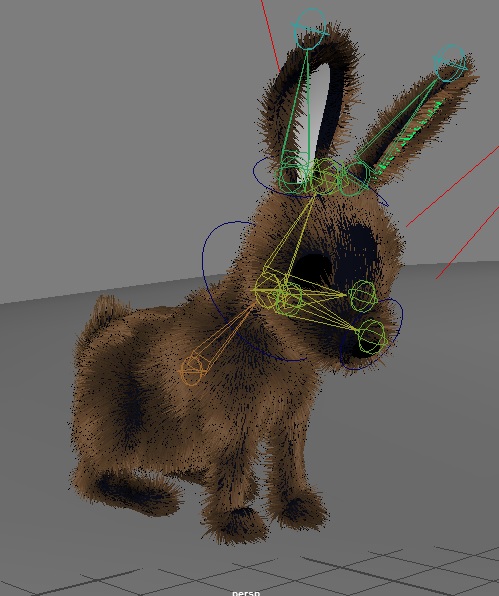
Now on to animating. to help me with this I starting just searching for rabbit video and seeing what movement they do. I particular based the animation off this video here, at about 2 minutes in when the bunny turns its head and the ears are twitching.
So based off this I decided to have the bunny lift it’s head, look to it’s left, then right towards the camera. Along with this I tried to add a bit of personality to him with twicthes of the ear especially in how they spread whenever a bunny settles seating, as well as the nose twitching up and down as if it where smelling something. After some feedback from Cassie about making the ears move a tad less drastically she was happy with it and I got over all good feedback from the class when they saw it.
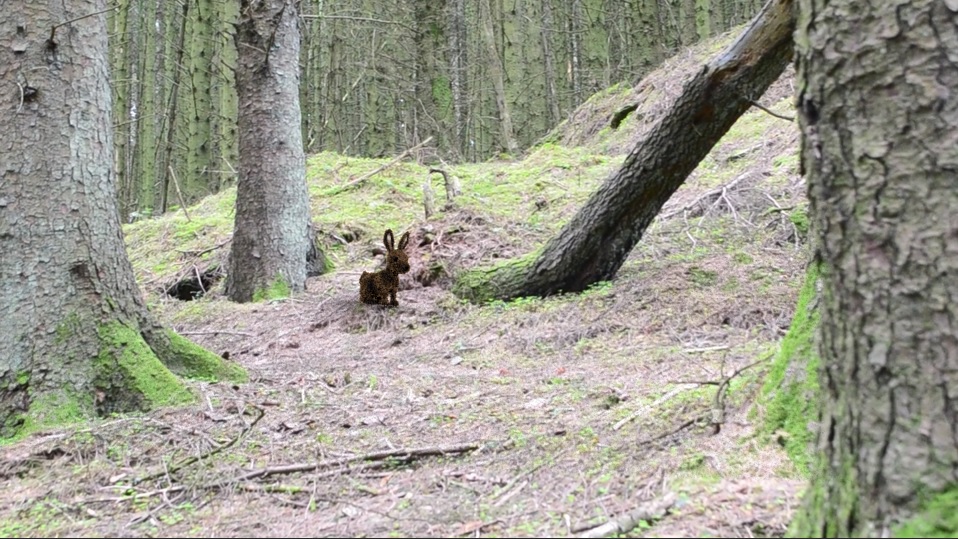
Then having this set up I was ready to get the bunny ready for render and compositing. Similarly to the burning car, I added a ground plane which was made into a shadow catcher. I then added 3 area lights, the main one at the back, and then added a skydome just to give off realistic lighting and to brighten up the scene as originally it was too dark. But once Cassie oked it for me to render it was fired into the footage. Cassie went on to colour correct this and track it within the scene.
On to the next scene that was done which was the birds. For this show we wanted to have a few birds flying off a tree and away. To help I asked Gianni if I could use his bird model which had been rigged for their BBC project, two which he was grand with. He also send me the painted textures for it, as well as some of the wing animation Jakob had done which it. This reduced my work load greatly as all I needed to do then was position the bird and look like it was moving at a natural speed in time with the wing flaps (altering the timing of these to match better) as well as lighting it to match the scene. As a reference I recorded on our filming day two birds which was flying over head of us, which although isnt the best, showed just how long bird can sore without actually needing to flap every two seconds much like it is in the cartoons. (Just did stills as the footage isn’t amazing plus is quite long with Cassie and I talking randomly in the background which nobody wants to hear haha).
Based off this I then went on to animate the rest of the bird, matching it up with the footage (though this did need flipped due to me being awkward, as often in films the movement is from left to right such as in Juno’s introduction, which would then contrast to the leaf going from right to left later to show time reversal, a small detail but one I wanted). For lighting I kept it simple with two area lights from behind the birds, originally just one but Cassie suggest a second as although the footage is silhouetted, we wanted to the birds to seen so the area lights are slightly tilted to show a little more of the top and bottom. After this was done and rendered there wasn’t anything major needed to composite them within the scene. (the final version fully composited can be seen in the final video).
One scene set up I was very keen on doing was the burning car as I wanted to simulate this for a while. To help we asked Jenny if we could use her truck from her BBC project, which she was happy for us to use. To help me with this I look at a easy to follow tutorial for the effect which helped a lot as it was the effect that I wanted to do really.
Below was my first try at it.
However after I had the simulation going I did move away by altering the amount it got pushed. Cassie also suggested changing some of the colouring so then it matched the scene better and looked more natural which I did (mostly it was changing the ratio of what was fire and what was thick dark smoke). To help better composite it within the scene I then set up a plane, matched it up with the background image, and made it a shadow catcher so then the shadow of the car would be in the scene. Lighting wise it was harder for me to figure out as it is in the bright open, I wasnt sure which direction it was coming from. I set up 3 area lights, the one from the sea direction the strongest so maybe at the start before the fire appeared the car would catch the light. I then added two lighter ones to make it generally more lit. Cassie like this but suggested adding a skydome to get the lighting looking more natural and surronding which I think helped a lot. Cassie had the textures done, but I had already done he simulation which was emitting from the car (which is all one object). So to get the correct textures I imported her car, and reapplied the textures to my car which I had already used. But in the end I got the scene set up with no real major problems.
Cassie was good for me to render our the passes for this. In the final she corrected some colour but also added so smoke around the around as if the plants around it had caugh fire as well via After Effects to make it fit in the scene a bit better. Here is the final break down video she put together showing this progress.
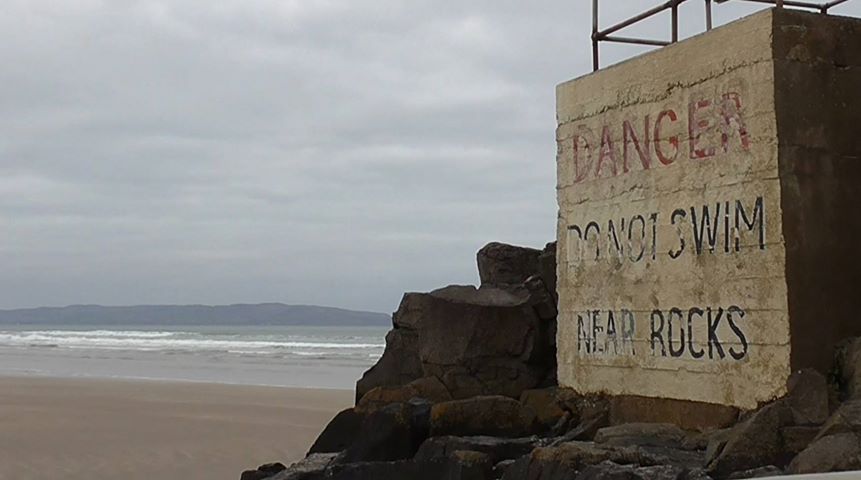
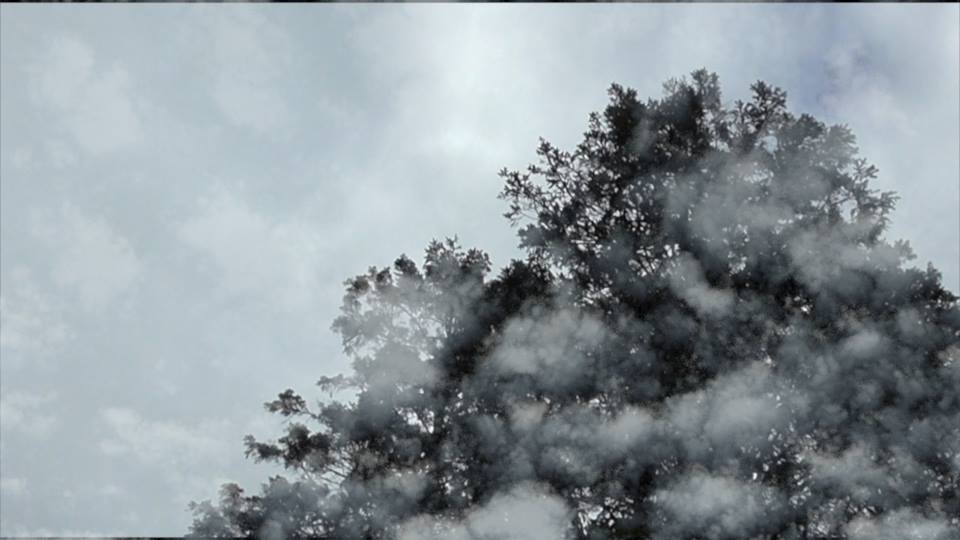
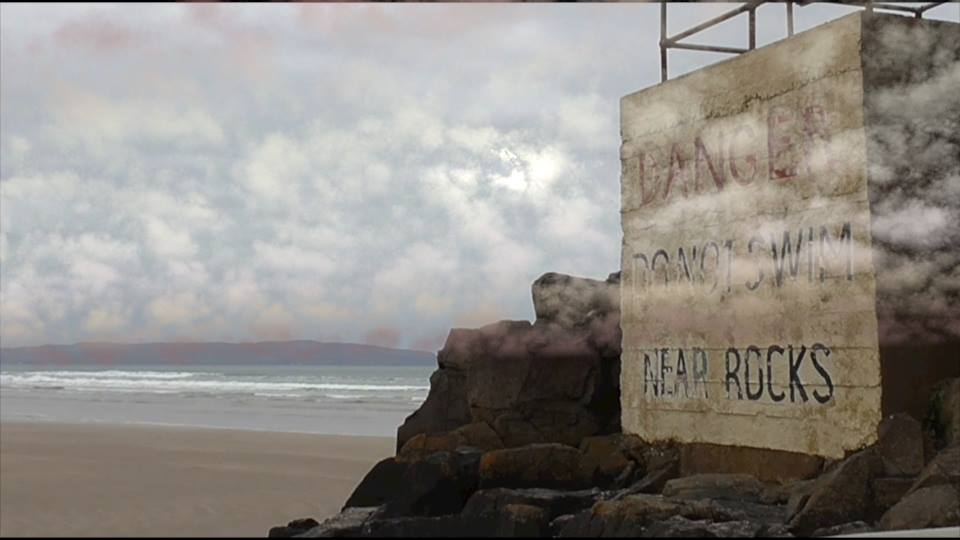
The next shots I decided to work on was the two Cloud shots. One would be at the start with bright, warm colours, the other would be near the end with dark, cooler colours. Both of these are timelapses of the sky moving. As we had an over case murky day when filming we had to make it work within the scene still, so there was a lot to be played with. Below are my scene set ups for both clouds.
Having done cloud simulations before in my last previous project I was keen to do this to experiment more with colours and how it moves. I set it up the same way as before, though for the warmer clouds I made the set up wider, as well as changing the shading graident to y so then it would fit better. Using the stills of the footage I set up the camera, then when I was happy asked Cassie for feedback on both. (Top image is the orgianl stills, the ones below are the clouds that have been added). Cassie said that both adding more colour as well as a light source would help a lot within these scenes.
So looking at paintings of clouds and sunsets from my Pinterest board, I then pumped up the colour tone. I then added a point light and uped the intensity so then it would act like a sun. Again, I asked for feedback and she was happy with the cooler clouds, but she felt the warmer sky needed warmer tones, to remove the purple tones in it.
This I then did, adding more red and burnt tones to the sky. This change Cassie liked and approved for both of these to go ahead and be composited within the scene.
From this Cassie then tone down the clouds opacity so then they would not stick out so much, and for them to match in with the back ground colours. She also made she the simulation could not be scene over the likes of the sign or the tree. Below is a break down she put together of both clouds.
The first shot I decided to do where the flower shots. We need 3 variations of these:
The Bud
The Blooming
The Decaying
To help I asked Megan if I could use her flowers that she made for our BBC project, which she was happy to allow. From these I at first looked at the possibility of using NCloth to create a natural flow, but I was unsure how to do this without the petals just dropping and acting like a cloth material. However when I looked into this I caught on quickly that there was not an easy way of implementing NCloth into it without rigging the flower, and even at the the flower needed to be modeled in such a way to allow the rig to work to allow the NCloth to work. This all seemed a tad too complicated for what I wanted to achieve, like there must be an easier way, so I decided to leave this way of doing it.
Having seen what Phillip did for the Easter project for our Monster to achieve his facial expressions, I decided the best way forward might be to use blend shapes. Alec had given us a lecture on this before which I found my notes on, however I make notes horribly so I had to watch a tutorial to refresh my memory and make sense of my cryptic notes. But it was easy to pick up and I was happy to go ahead with this method.
The first one I began to do was the Flower Bud. This seemed a tad easier as this model only had the four petals to alter. Below are the blend shapes I created for it. From this I then key framed the animation, positioned it correctly to a still background of what would be our footage, and then asked Cassie for some feedback on it. Cassie was really happy with the bud animation, and the only thing she said to change was the steam movement in that it was a bit too static, but overall was happy with the animation.
As for the Flower Blooming and Decaying I decided to do this in the same file as it is using the same model, plus I believed the transition between the two would be a bit smoother. Using the timelapse flower references especially for these ones, I again create another series of blend shapes. I then again animated this, and positioned it in a place that might be good for the footage, using a still as a reference. Again I asked Cassie for some feedback, in which again she was overall happy with it, but felt that although the decay part was fine, the bloom part was too static in movement, and again I needed to move that steam more.
*From the feedback given, I made the changes that Cassie asked for as seen below.*
For rendering, first Cassie kindly sat with me showing how to set up the scene as best as possible so then it could be composited well within the scene. The main two main things she talked about where:
The light – know which direction it is coming from in your footage, then try to replicate at the same intensity/ exposer/ colour. etc. For this we used 3 Area lights, the strongest one being from the right hand side.
Texture – Make sure it looks really rather than just an image or plastic. Bump maps seem to be of use her for creating noise on the texture. For this we kept to mainly the same texture as was on the model when Megan sent it (one the two of use work on anyways). The colour and ramp where alter to suit the scene more and the colours within it just.
I applied a similar and texture set up then for the Bloom and Decay shot, and these are two renders of the set up.
Cassie then imported the image sequence into after effects. We had to render out a AO for the bud to try and improve it in the scene (we wanted to do this for the Bloom and Decay but could not get the scenes to match up so had to leave it), but after that, colour correcting and so on they where ready to go. Cassie kindly did a break down of the Bud for an example of how it was implemented into the scene.
My main job was to animate our 4 eggs as well as set up the camera, and editing the previsuals together (bar music, Caitlin was in charge of adding the sound after I edited). This was constantly updated for our regular meetings with Niall and for presentation for Alec/ The Class.
For the first animatic I tried to follow the storyboard and 2D animatic closely while positioning the camera in appropriate places. Feedback was that the animation was at a good start for the eggs (at this stage the monster still had far to go), but many of the camera shots where a bit off such as when the eggs bounce off the bridge as it was at a strange angle. Another is when we have the POV from the monsters view, that it would be better to have the camera zoom into the eggs as the focus point of the frame is too small. Another thing notes was that there wasn’t a long enough build up of the monster, that we just show it, and instead we need to ease the audience into a reveal to add to the fear factor of this monster. Another point was that the introduction shot needed change, that it didn’t add anything to the story or magic, and just seemed like we where showing off our set.
For our second animatic the changes above where implemented along with many environmental changes. Already a strong improvement could be seen. The first introduction shot was changed to it moving down river, which was liked but the movement was too much and too fast, it needed slowed as well as to come from a different direction to give more of a revel of the environment. The shot of the eggs bouncing off the bridge worked far better, as well as the build up of the monster with the zoom in to the eggs – the shadow of the monster coming over – to the tilt. The monster still needed rigged as well as refining the eggs animation more including the environment.
Changed where made and the eggs began to be refined, though I still needed to add more weight to their jumps so they seemed less floaty. I was told to just make sure when refining this more to make sure the eggs personalities did show. The introduction shot still needed slowed down a lot even though it was now coming from a better direction. The main area of focus was now refining the monster and his movement – in how he looks down at the eggs in the tilt – how he slams down on the ground – having him grab the eggs and actually chew on them. There was also suggestion of making the vomit 2D instead of particles (which although had yet to be done was in discussion).
These changes again where made and everything was refined and more fine tuned from the animation to the set to the camera angles. Niall was happy with this version of it said there was little else feedback he could give as we had changed all that he wished really.
However after going through it after Phillip and I wanted to make the most of some of the monster animation, mostly in the vomit shot. We felt this was too static, that when you are sick you don’t just stand that. So since he had animated him being propelled forward, we decided to lower the camera angle slightly, making both the shot and animation a tad more realistic. (This version has the sound in it, although all of them did when creating it which was altered throughout to match the animation changes due to timing).
A minor change that was made after as well as one of the egg movements. Alec suggested having the egg bounce away instead of sliding. This change was made and everyone agreed it looked better for it.